This post is a preview of the in-depth information included in our Thermoforming Handbook, a guide previously only available to our customers and partners.
If you would like a copy of our design handbook (or any other technical materials), please click here to access our library page.
The Process of Thermoforming
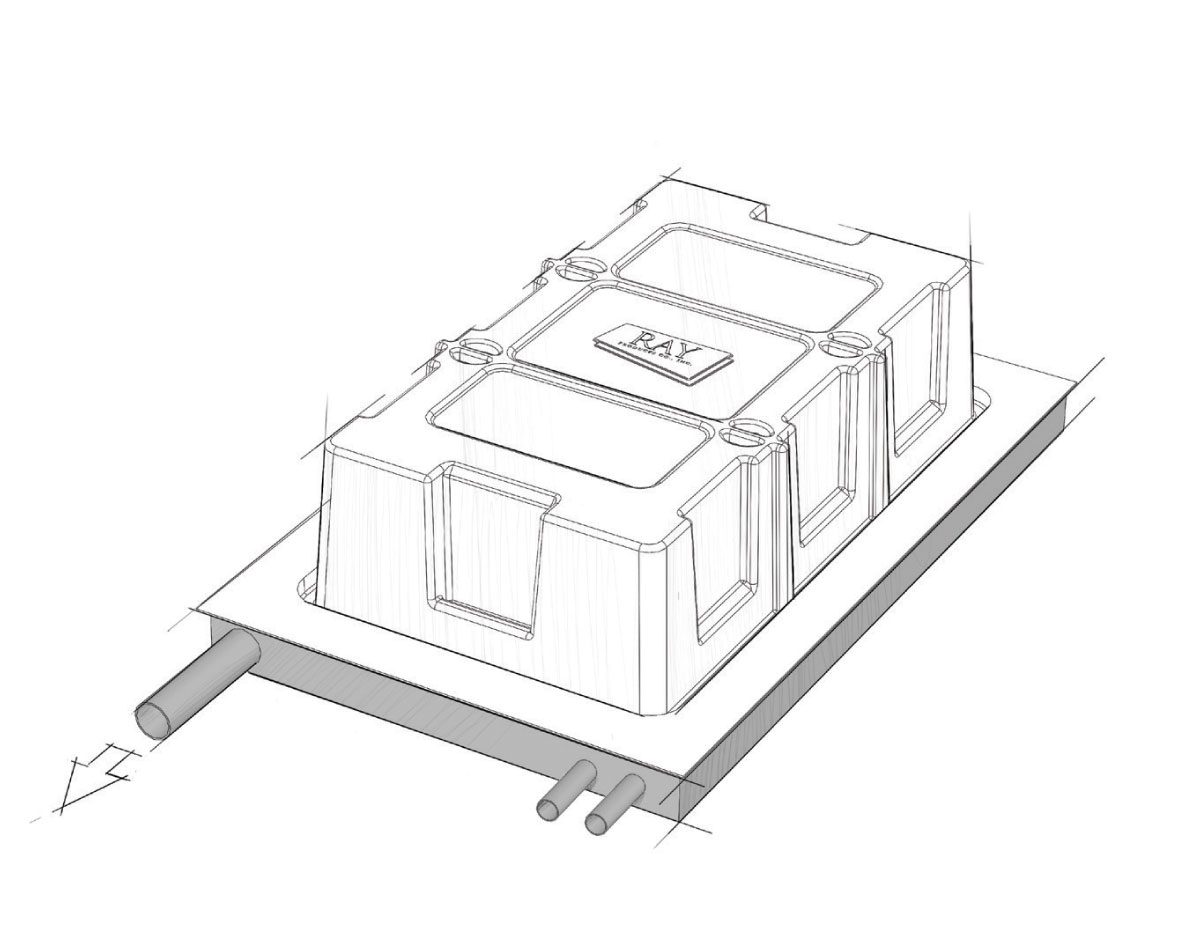
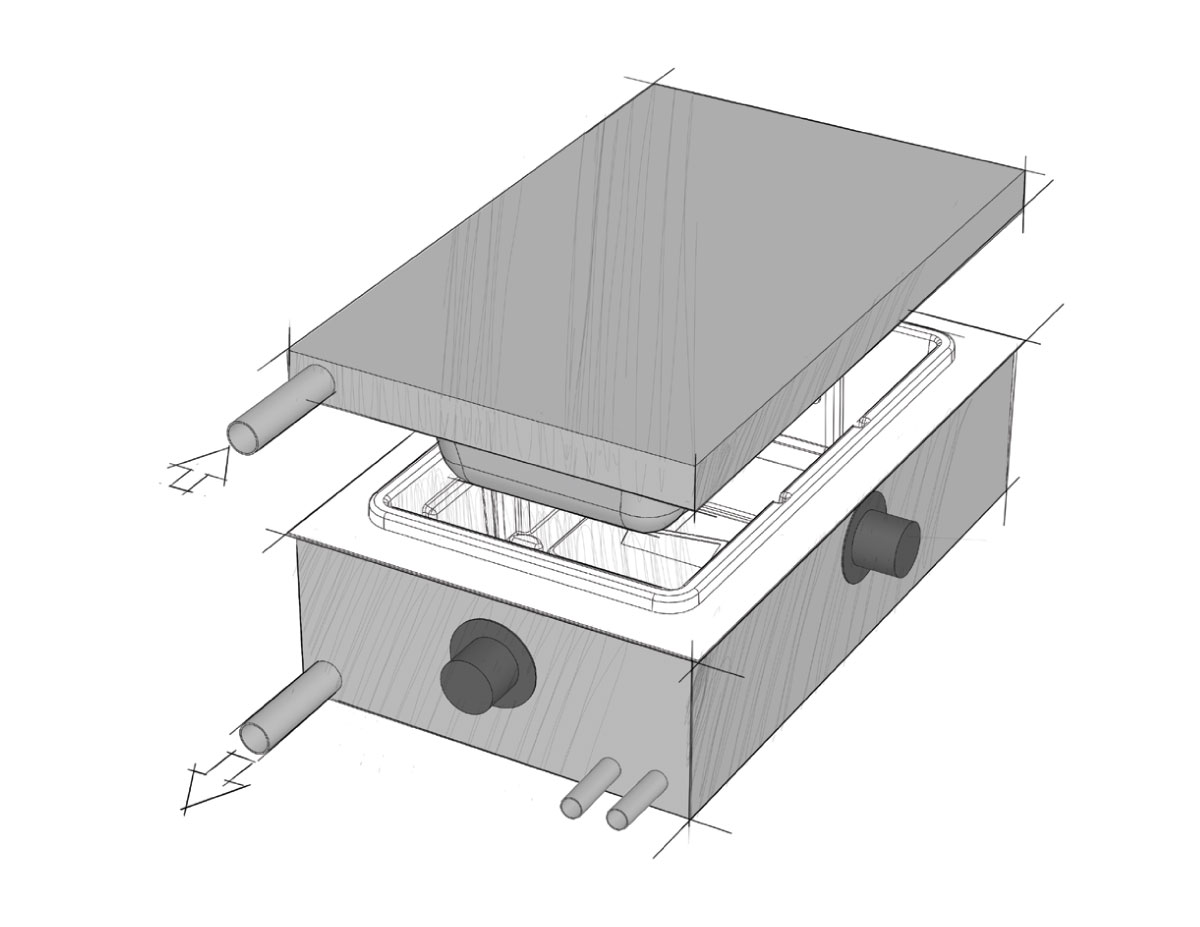
Both pressure forming and vacuum forming are processes that are easiest to understand when they’re explained visually.
Step 1
First, a sheet of thermoplastic is heated until it becomes pliable and moldable.


Step 2: Vacuum Forming
In the vacuum forming process, the plastic is stretched over a single male mold, and the air is vacuumed out from underneath the mold.

Step 2: Pressure Forming
In pressure forming, the heated plastic is placed between male and female molds, which are then pressed against the plastic sheet using compressed air at a pressure that ranges from 20 to 100 psi.

Step 3
Finally, the now molded plastic part is removed from the mold and allowed to cool. It’s then moved to a trimming station where the excess plastic is removed with a six-axis fully robotic trimming machine.

Key Advantages of Thermoforming
Cost at Quantity
If your part requirements range from the low hundreds to the high thousands, thermoforming is almost always the chosen process.
Large Part Capability
Our thermoforming machine, the largest on the West Coast, can create single pieces up to a full 10 feet x 18 feet, with up to 40 inches of depth.
Huge Thermoplastic Material Selection
Any color, including metallics, fire-rated, impact-resistant, UV resistant, antibacterial properties, ROHS/REACH compliant, recyclable and so much more.
Complex Geometry Without High Costs
Make complex shapes without high tooling costs.
Part-to-Part Repeatability
Consistency and precision from part number 1 to part number 5,555; with no warpage, improved flatness and zero residual stress.
Molded-In-Features for Easy Assembly
Make assembly cheaper and faster with undercuts, molded-in attachment points, tabs, slots and more.
Beautiful & Flexible Finishing Options
Mold in color and texture, paint, silkscreen, EMI/RFI shielding and more. The choice is yours.
Lower Cost Design Changes
Make changes quickly without spending thousands on new or reworked tooling.
Pick a Texture, Any Texture
From high-gloss to matte to custom, you’ve got options for textures.
Comparing Vacuum Forming & Pressure Forming
| Vacuum Forming | Pressure Forming | |
|---|---|---|
| Description | A sheet of plastic material is heated to pliability, then pressed against a 3D mold by vacuuming out the air between the sheet and the mold. | A sheet of plastic material is heated to pliability, then pressed against a 3D female cavity mold by vacuuming out the air between the sheet and the mold, and applying compressed air from 20 to 100 psi above the plastic sheet. |
| Common Applications |
|
|
| Often Used to Create |
|
|
| Dimensions | Male tool, vacuum formed parts to be dimensioned to the inside surfaces of the part. | Female tool, pressure formed parts to be dimensioned to the outside surfaces of the part. |
